Quality Gate: What is and how to configure it
What is a Quality Gate
A quality gate is a set of conditions that indicates if the project analyzed is "good enough for you or not" to be delivered to the next stage in your software life cycle. Those conditions are defined using the metrics and KPI collected for each project.
It means, you can define the quality policy in your organization, required for each kind of project.
Quality Gates strategy
The first thought usually is: my organization has or will define a quality policy for ObjectScript language, so I will need only one quality gate to verify all my ObjectScript projects. In a small organization with a few projects maybe it could work, but usually it is not the best policy.
Probably you will have legacy projects with more than a decade of developers working on it, with legacy code inherited from older ObjectScript versions. And probably you will have many code from the years in which code guidelines where different or even didn't exist. On the other hand, you will start new projects, which means that you will be more strict on qulity policy.
After your first analysis of an existing project, you will get thousands of issues and probably a too big technical debt, so you will be scared about the product code and worried about how to get it solved as soon as possible. At this point, you should be quite as you cannot solve the problem in a quick way and while probably it is currently on a production environment since years ago, just breath and let's think about. Now you have the picture of your situation and the best way to start is ensuring new code is well qualified, so you don't get a more degradated situation. At the same time, and after SonarQube is properly integrated in your development teams, you can start requesting for small improvements on each development cycle, so you will get a better code along time and avoiding to dedicate specific resources to solve the legacy problems.
SonarQube is provided with a "Sonar way" quality gate by default and read-only, so you cannot change its definition. This quality gate can be adjusted from release to release, accordingly to SonarQube's capabilities.
Since SonarQube 7.6, quality gate definitions has been simplified and the default "Sonar way" quality gate is focused on the quality in new code. It means you will hold your old code, but any change should left the situation not worst that it was.
Our recommendation is to create your own quality gates to adjust to what is important to you. And, at least, we recommend to create a quality gate for legacy projects and another one for new projects.
With this very basic approach you can, for example, ask for small improvements on legacy projects. So any developer involved in solving an issue or developing a new functionallity, will have to take care on making some improvement on his piece of code.
Along time, you will need to update your quality gates to have a better approach required for each situation. And probably you will finally have a quality gate for each legacy project and a quality gate for most of the new projects. It is important to do periodic reviews of your configuration to ensure the quality gate fits correctly for your needs on each project. We recommend you to review the quality gate after you close a major or minor release, while avoid it for build and revision releases.
Quality Gate status
At the top of each project page you can see if you project has passed or not the quality gate:
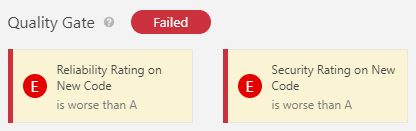
In case the quality gate validation fail, it will show the conditions of failure:
Security
Quality Gates can be accessed by any user (even anonymous users). All users can view every aspect of a quality gate.
To make changes (create, edit or delete) users must be granted the Administer Quality Profiles and Gates permission.
A project administrator can choose which quality gates his/her project is associated with.
Define a Quality Gate (since SonarQube 7.6)
From the Quality Gate menu entry you will find a Create button. On click, you will be asked for the name you want to use.
A good start if it is your first quality gate is to go to "Sonar way" quality gate and click on Copy button.
Whatever the method you start, you will see the conditions applied for the quality gate.
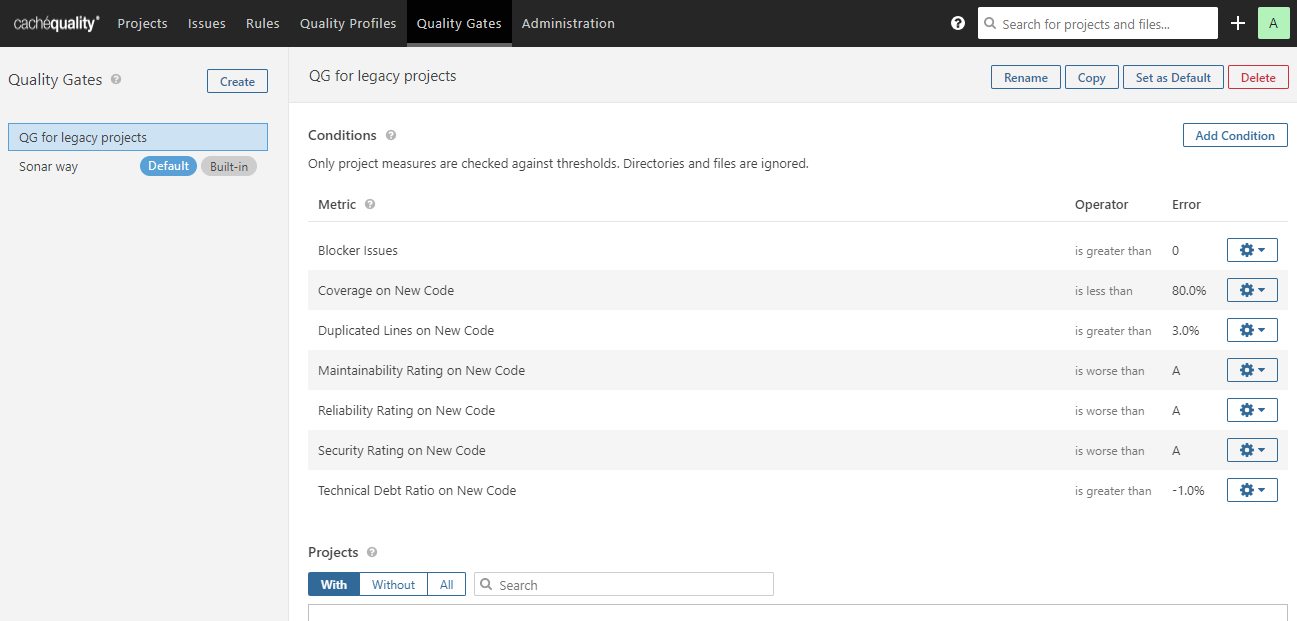
You can add a new conditon from the Add Condition button. On the popup select the metric you want to test and then define the threshold for the given operator.
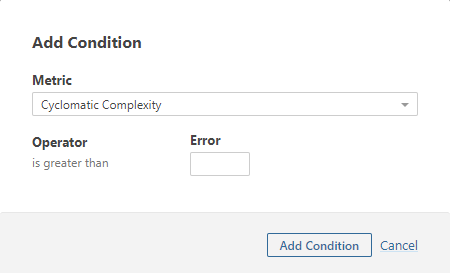
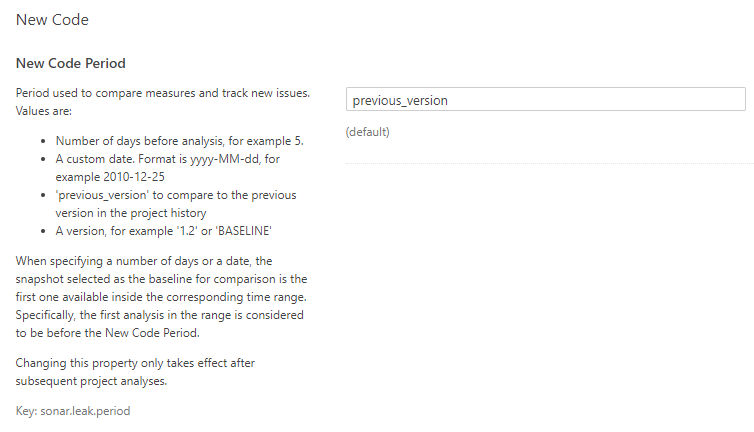
If you want to use a metric only over the new code, type "New Code" on the Metric dropdown and you will get all the new code metrics that you can use. The new code can be defined in different ways, but the most common is: code added from the previous version. We explain how to define it in below section.
Since SonarQube 7.6, operator is always defined by the system and there is no warning threshold.
After you define all your conditions, you can go down to Projects section in the same quality gate page definition and search for the projects in which you want to apply your new quality gate.
Configure default New Code period
To define the default leak period for any new project, go to Administration > Configuration > General settings, and select the General tab.
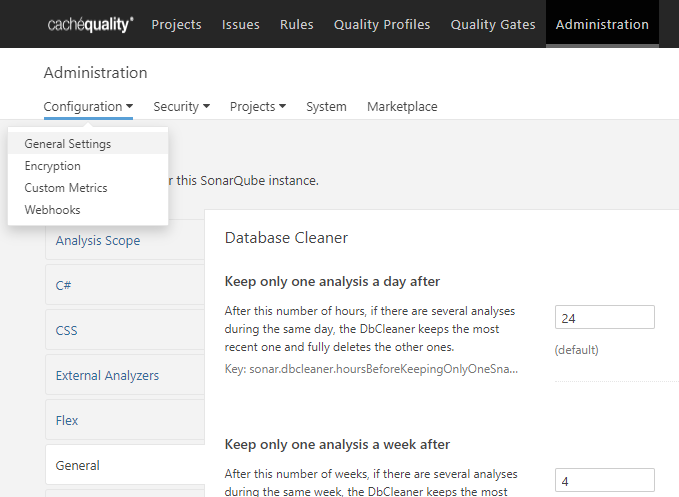
At this tab you will find the New Code section, where you cand define how is the new code period calculated:
Configure New Code period for a project
From the project dashboard, go to Administration > General settings, and select the General tab.
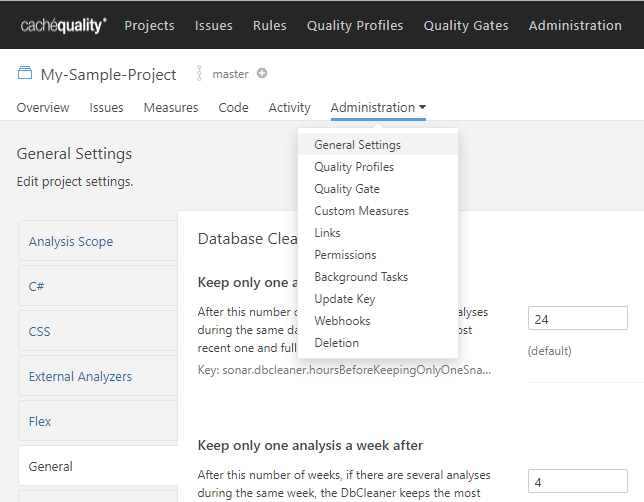
At this tab you will find the New Code section, where you cand define how is the new code period calculated:
Define a Quality Gate (previous to SonarQube 7.6)
From the Quality Gate menu entry you will find a Create button. On click, you will be asked for the name you want to use.
A good start if it is your first quality gate is to go to "Sonar way" quality gate and click on Copy button.
Whatever the method you start, you will see the conditions applied for the quality gate.
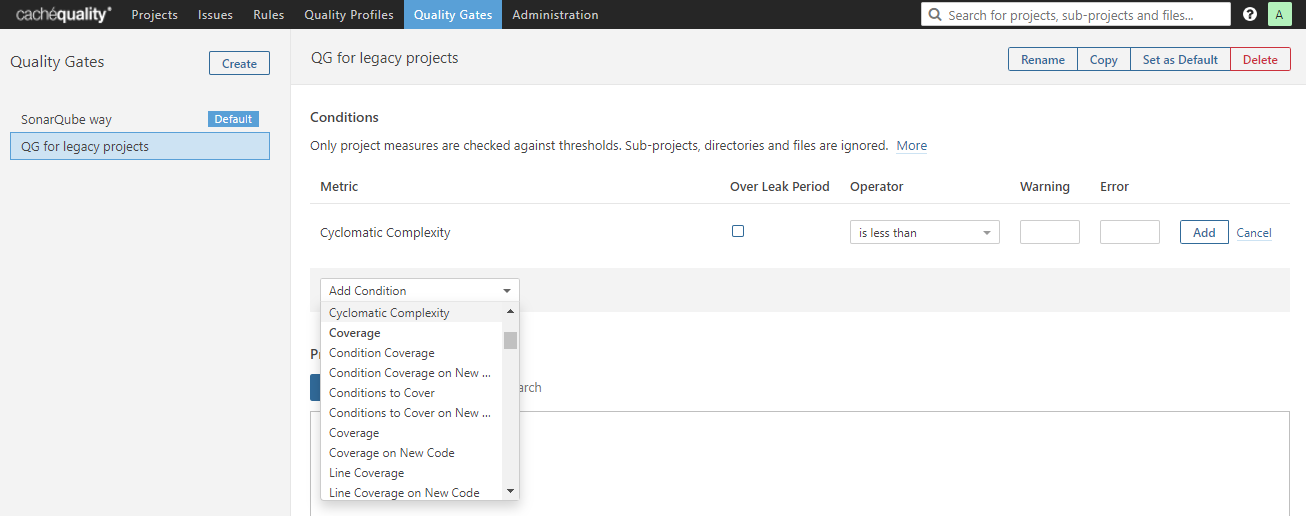
You can add a new conditon from the Add Condition dropdown. After you select your metric, it will be added to the list and you can define the operator to use and the warning and error thresholds.
You can also define if you want to do the comparison for the absolute metric measure, or if you want to compare only the measure difference over the leak period. The leak period can be defined in different ways, but the most common is: code added from the previous version. We explain how to define it in below section.
After you define all your conditions, you can go down to Projects section in the same quality gate page definition and search for the projects in which you want to apply your new quality gate.
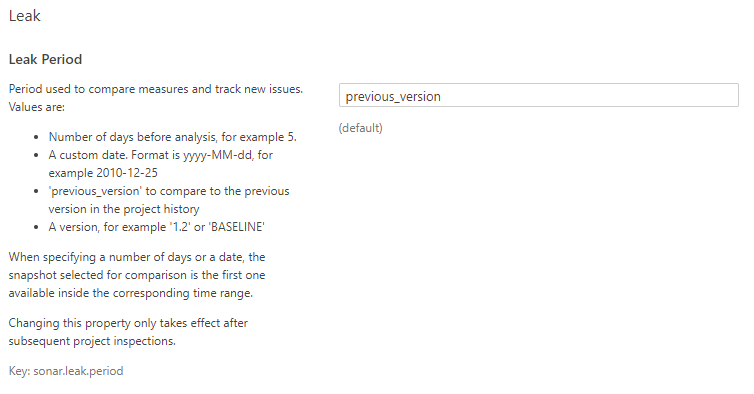
Configure default Leak period
To define the default leak period for any new project, go to Administration > Configuration > General settings, and select the General tab.
At this tab you will find the Leak section, where you cand define how is the leak period calculated:
Configure Leak period for a project
From the project dashboard, go to Administration > General settings, and select the General tab.
At this tab you will find the Leak section, where you cand define how is the leak period calculated: