Setup a new project in Jenkins
1. Create a new item
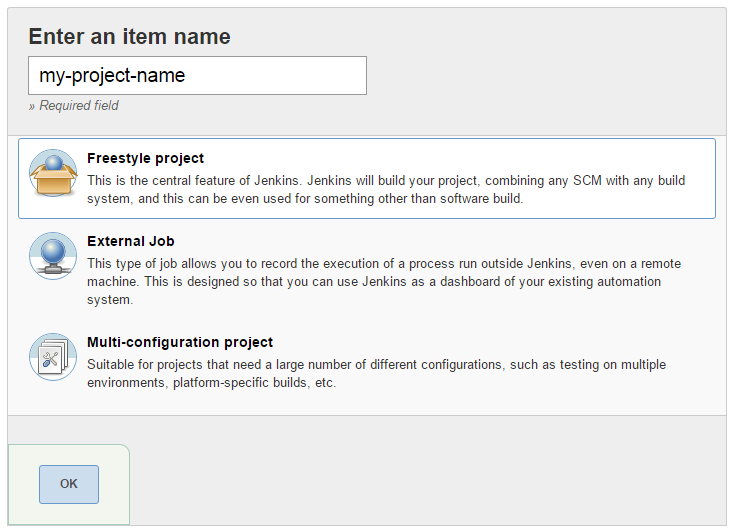
1.1 From the main dashboard click on New Item
1.2 Enter the name for your project, then select Freestyle project and click OK.
2. Fill project datasheet
After you have created the item, a datasheet with multiple tabs is opened to setup your project. Next there is a fast view of each tab.
2.1 General tab
Project name. This is the name that you will see on SonarQube. Be sure to set the final name because if you change it after a run, you will have two projects on SonarQube: one with the previous name and one with the current name.
Github project. If your project is in Github, you could select this option and avoid installing git on your system. This option is only valid for a public repository on Github. Is your repository on Github is private, configure is as a git repository.
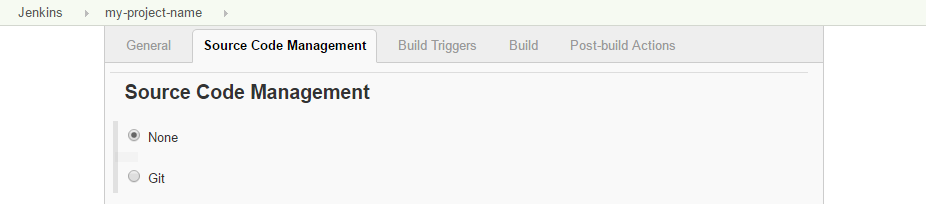
2.2 Source Code Management tab
You will see the list of Source Code Management plugins you have installed on Jenkins. If you are using a different SCM from which you can see, then install the plugin for your repository.
Select the repository from which the code should be retrieved and configure any requirement for the plugin.
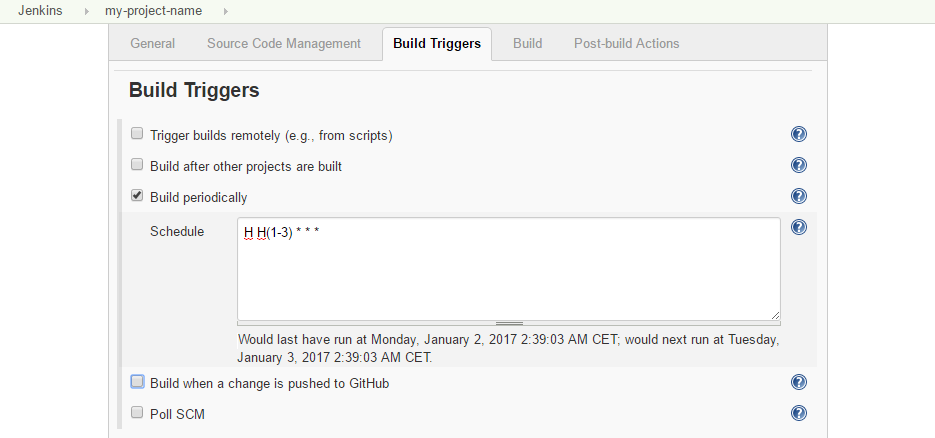
2.3 Build Triggers tab
Configure the build periodically. In the next example, we build each day between 1am and 3am.
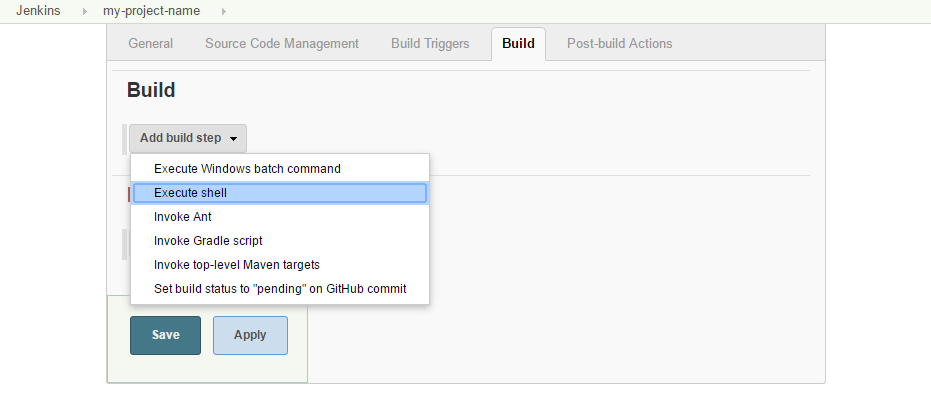
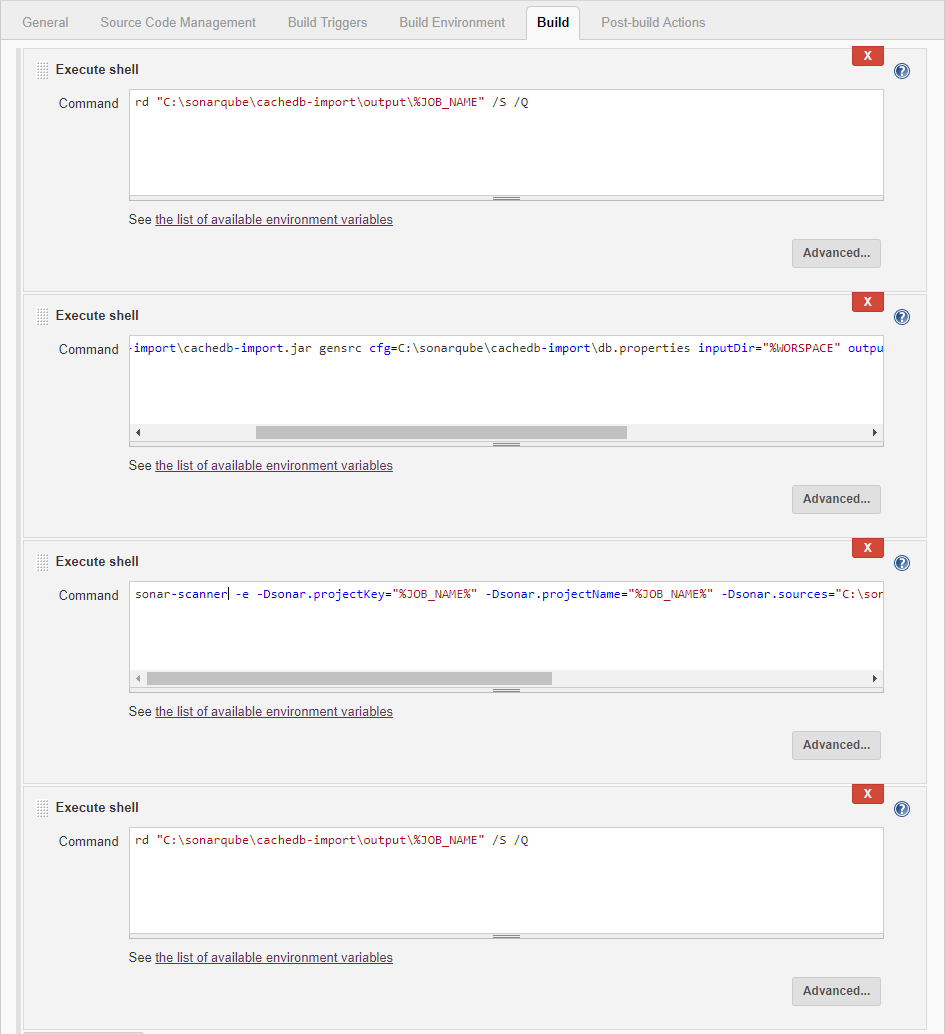
2.4 Build tab
2.4.1 Add a build step Execute shell to clean the output directory to avoid errors if previous execution failed and path is not clear
rd "C:\sonarqube\cachedb-import\output\%JOB_NAME" /S /Q
2.4.2 If you don't setup any source code management, add a build step Execute Windows batch command to copy your local sources to the workspace
xcopy /E "C:\my\sources\path" "%WORKSPACE%"
2.4.3 Add a build step Execute Windows batch command; if your sources are in XML formant, the first execution must be the transformation to cls
java -jar C:\sonarqube\cachedb-import\cachedb-import.jar gensrc cfg=C:\sonarqube\cachedb-import\db.properties inputDir="%WORSPACE%" outputDir="D:\sonarqube\cachedb-import\output\%JOB_NAME%"
Alternatively, if your code does not require any transformation, then execute the following command instead
xcopy /E "%WORKSPACE%" "C:\sonarqube\cachedb-import\output\%JOB_NAME%"
2.4.4 Add a build step Execute Windows batch command; now you must run sonar-runner, this is the analysis step
cd "C:\sonarqube\cachedb-import\output\%JOB_NAME%"
sonar-scanner -Dsonar.projectKey="%JOB_NAME%" -Dsonar.projectName="%JOB_NAME%" -Dsonar.sources=. -Dsonar.projectVersion=1.0
2.4.5 Add a build step Execute Windows batch command as finally we need to clean the output directory or you will get errors on next run
rd "C:\sonarqube\cachedb-import\output\%JOB_NAME%" /S /Q
Those steps can be different accordingly to your configuration and your sources format. Here we are processing XML source files.
2.5 Post-build Actions tab
The cachéQuality analysers does not need any post-build action, but you can setup any requirement you have
2.6 Save
Remember to save your configuration.
1. Create a new item
1.1 From the main dashboard click on New Item
1.2 Enter the name for your project, then select Freestyle project and click OK.
2. Fill project datasheet
After you have created the item, a datasheet with multiple tabs is opened to setup your project. Next there is a fast view of each tab.
2.1 General tab
Project name. This is the name that you will see on SonarQube. Be sure to set the final name because if you change it after a run, you will have two projects on SonarQube: one with the previous name and one with the current name.
Github project. If your project is in Github, you could select this option and avoid installing git on your system. This option is only valid for a public repository on Github. Is your repository on Github is private, configure is as a git repository.
2.2 Source Code Management tab
You will see the list of Source Code Management plugins you have installed on Jenkins. If you are using a different SCM from which you can see, then install the plugin for your repository.
Select the repository from which the code should be retrieved and configure any requirement for the plugin.
2.3 Build Triggers tab
Configure the build periodically. In the next example, we build each day between 1am and 3am.
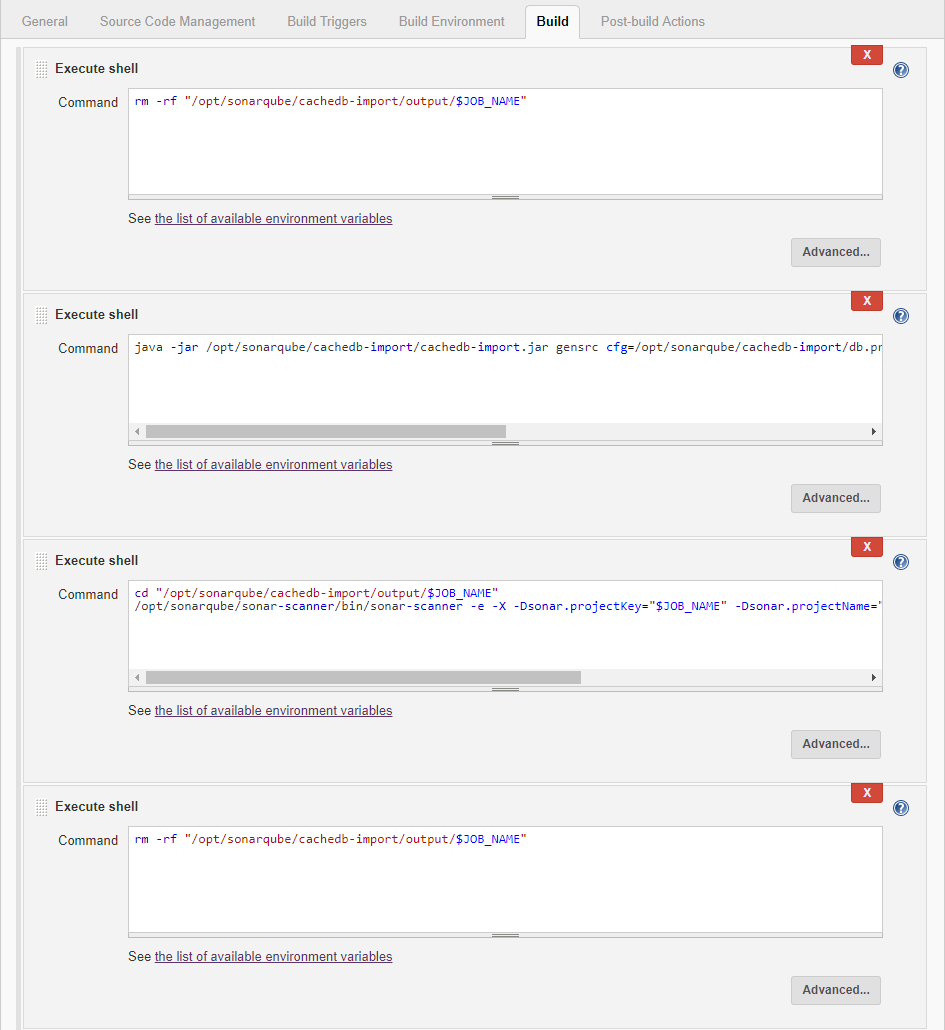
2.4 Build tab
2.4.1 Add a build step Execute shell to clean the output directory to avoid errors if previous execution failed and path is not clear
rm -rf "/opt/sonarqube/cachedb-import/output/$JOB_NAME"
2.4.2 If you don't setup any source code management, add a build step Execute Windows batch command to copy your local sources to the workspace
cp -r "/my/sources/path" "$WORKSPACE"
2.4.3 Add a build step Execute shell; if your sources are in XML formant, the first execution must be the transformation to cls
/opt/java/default-jdk/bin/java -jar /opt/sonarqube/cachedb-import/cachedb-import.jar gensrc cfg=/opt/sonarqube/cachedb-import/db.properties inputDir="$WORKSPACE" outputDir="/opt/sonarqube/cachedb-import/output/$JOB_NAME"
Alternatively, if your code does not require any transformation, then execute the following command instead
cp -r "$WORKSPACE" "/opt/sonarqube/cachedb-import/output/$JOB_NAME"
2.4.4 Add a build step Execute shell; now you must run sonar-runner, this is the analysis step
cd "/opt/sonarqube/cachedb-import/output/$JOB_NAME"
/opt/sonarqube/sonar-scanner/bin/sonar-scanner -Dsonar.projectKey="$JOB_NAME" -Dsonar.projectName="$JOB_NAME" -Dsonar.sources=. -Dsonar.projectVersion=1.0
2.4.5 Add a build step Execute shell as finally we need to clean the output directory or you will get errors on next run
rm -rf "/opt/sonarqube/cachedb-import/output/$JOB_NAME"
Those steps can be different accordingly to your configuration and your sources format. Here we are processing XML source files.
2.5 Post-build Actions tab
The cachéQuality analysers does not need any post-build action, but you can setup any requirement you have
2.6 Save
Remember to save your configuration.