Jenkins Installation
1. Get Jenkins
1.1 Download the latest stable version of Jenkins Generic Java Package (.war) to your Downloads folder
On Windows Edge, the .war file is downloaded with the .zip extension. You must change the extension to .war in order to get it working.
2. Deploy to Apache Tomcat
2.1 Copy the downloaded war file to %CATALINA_HOME%\webapps
3. Configure the Jenkins webapp
3.1 Create the folder %SONARQUBE_HOME%\jenkins-home
3.2 Create the jenkins.xml file for the Apache Tomcat localhost site
<Context docBase="jenkins" path="/jenkins" reloadable="true">
  <Environment name="JENKINS_HOME" value="C:\sonarqube\jenkins-home" type="java.lang.String"/>
</Context>
On most Windows systems you will need to run your text editor as administrator to get the file saved on the Catalina home.
4. Restart the service
4.1 Restart the Apache Tomcat service
5. Setup Jenkins
5.1 Open Jenkins in your browser: http://localhost:8080/jenkins
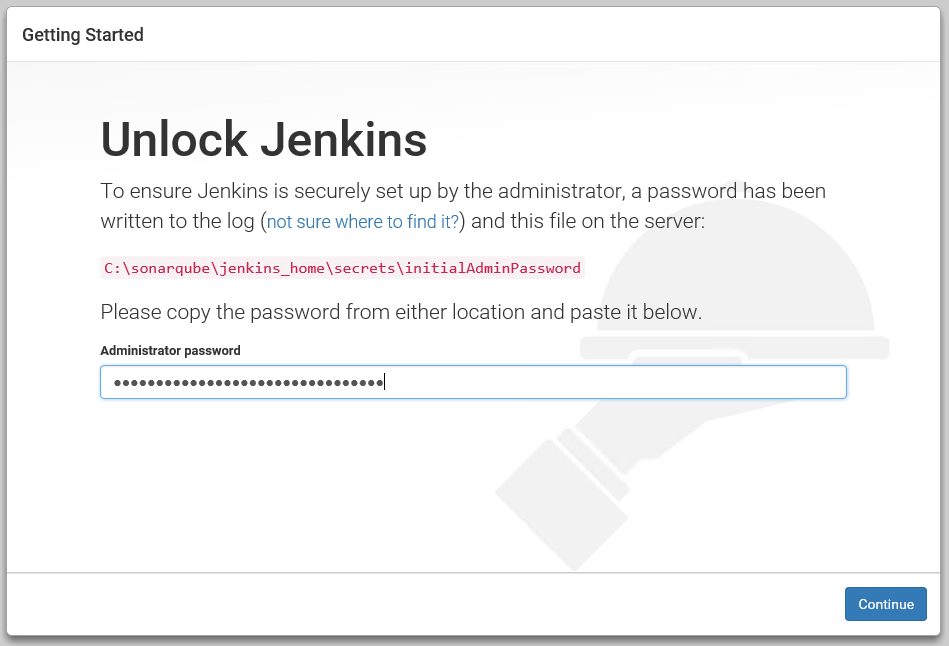
5.2 The first time you navigate Jenkins you will need to log in with the administrator password stored in the file shown, in our example it is in %SONARQUBE_HOME%\jenkins-home\secrets\initialAdminPassword
5.2 Continue and in the next step click on Install suggested plugins
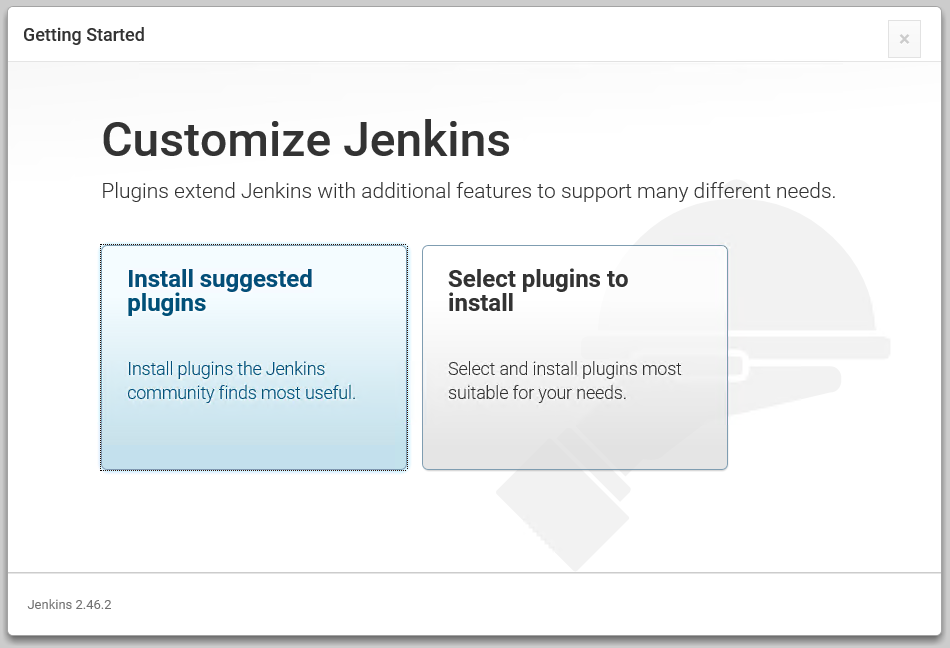
If you are an advanced user in Jenkins then click on Select plugins to install in order to install only the useful plugins for your environment.
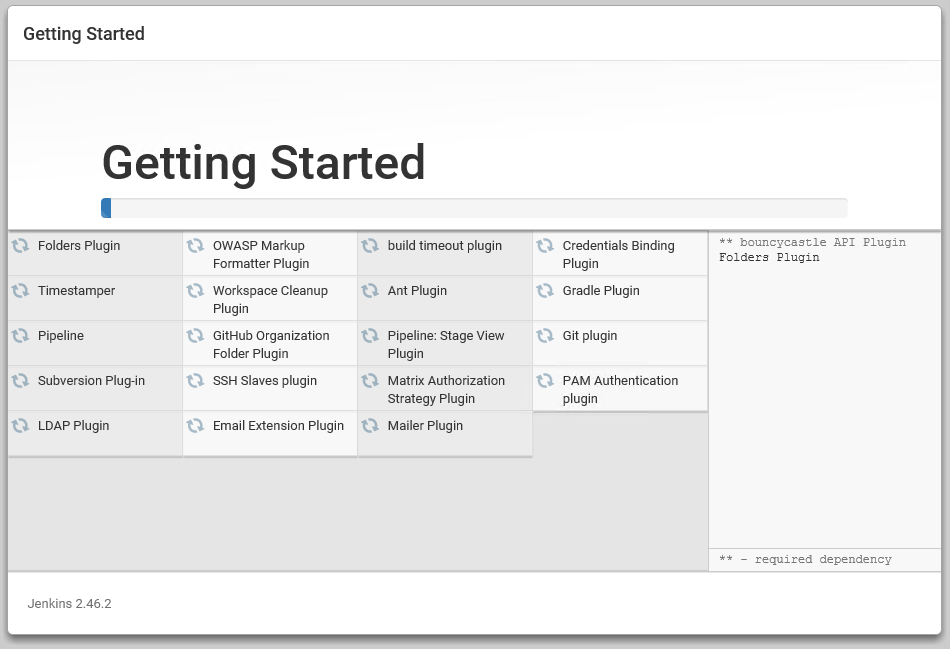
5.3 Wait the plugins installation is completed
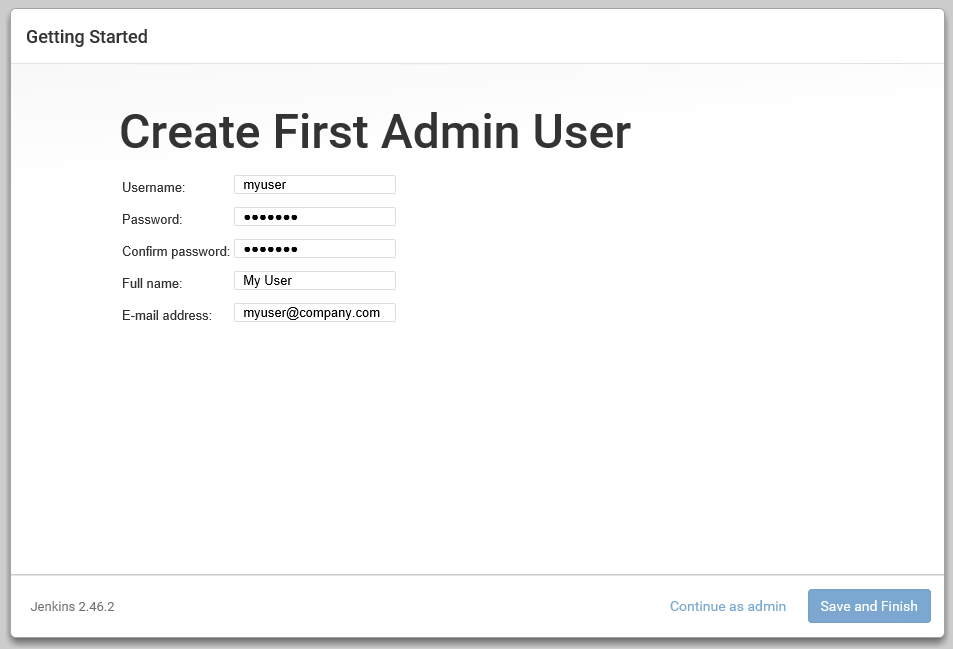
5.4 Create a new administrator user, as it is not recomended to use the super administrator admin
5.5 Jenkins is installed and ready to work
1. Get Jenkins
1.1 Create the /opt/tomcat-webapps-jenkins folder
$ sudo mkdir /opt/jenkins
$ sudo mkdir /opt/jenkins/tomcat-webapps
$ sudo mkdir /opt/jenkins/home
$ sudo chmod o-rx /opt/jenkins/tomcat-webapps
1.2 Download the latest stable version of Jenkins via wget command to /opt/tomcat-webapps-jenkins folder
$ sudo wget http://mirrors.jenkins-ci.org/war-stable/latest/jenkins.war -O /opt/jenkins/tomcat-webapps/ROOT.war

$ sudo chown -R tomcat8:tomcat8 /opt/jenkins
2. Setup Apache Tomcat 8
2.1 If you have installed Apache Tomcat 8 manually and setup service with systemctl, add Tomcat parameters on /lib/systemd/system/tomcat8.service
...
Environment='JAVA_OPTS="-Djava.awt.headless=true -Djava.security.egd=file:/dev/./urandom -DJENKINS_HOME=/opt/jenkins/home"'
...
2.2 If you have installed Apache Tomcat 8 manually and setup service with init.d, add Tomcat parameters on /etc/init.d/tomcat8
...
JAVA_OPTS="-Djava.awt.headless=true -Djava.security.egd=file:/dev/./urandom -DJENKINS_HOME=/opt/jenkins/home"
...
2.3 If you have installed Apache Tomcat 8 using your Linux distribution, add Tomcat parameters on /etc/default/tomcat8
...
JAVA_OPTS="-Djava.awt.headless=true -Djava.security.egd=file:/dev/./urandom -DJENKINS_HOME=/opt/jenkins/home"
...
3. Configure the Jenkins webapp
3.1 If you have installed Apache Tomcat 8 manually, add your Jenkins host in /opt/tomcat8/current/conf/server.xml
<Host name="jenkins.mydomain.com" appBase="/opt/jenkins/tomcat-webapps" unpackWARs="true" autoDeploy="true"> <Alias>jenkins.mydomain.com</Alias> <Valve className="org.apache.catalina.valves.AccessLogValve" directory="logs" prefix="jenkins.mydomain.com_access_log" suffix=".txt" pattern="%h %l %u %t "%r" %s %b" /> </Host>
If you are installing Jenkins in the same server than SonarQube and/or intend to install Apache2 as a proxy (or another proxy), then use "localhost" instead "jenkins.mydomain.com" and don't use Alias.
3.2 If you have installed Apache Tomcat 8 using your Linux distribution, add your Jenkins host in /etc/tomcat8/server.xml
<Host name="jenkins.mydomain.com" appBase="/opt/jenkins/tomcat-webapps" unpackWARs="true" autoDeploy="true"> <Alias>jenkins.mydomain.com</Alias> <Valve className="org.apache.catalina.valves.AccessLogValve" directory="logs" prefix="jenkins.mydomain.com_access_log" suffix=".txt" pattern="%h %l %u %t "%r" %s %b" /> </Host>
If you are installing Jenkins in the same server than SonarQube and/or intend to install Apache2 as a proxy (or another proxy), then use "localhost" instead "jenkins.mydomain.com" and don't use Alias.
4. Restart the service
4.1 Restart the Apache Tomcat service
$ sudo service tomcat8 restart
4.2 Configure your firewall to allow port 8080
5. Setup Jenkins
5.1 Open Jenkins in your browser: http://jenkins.mydomain.com:8080
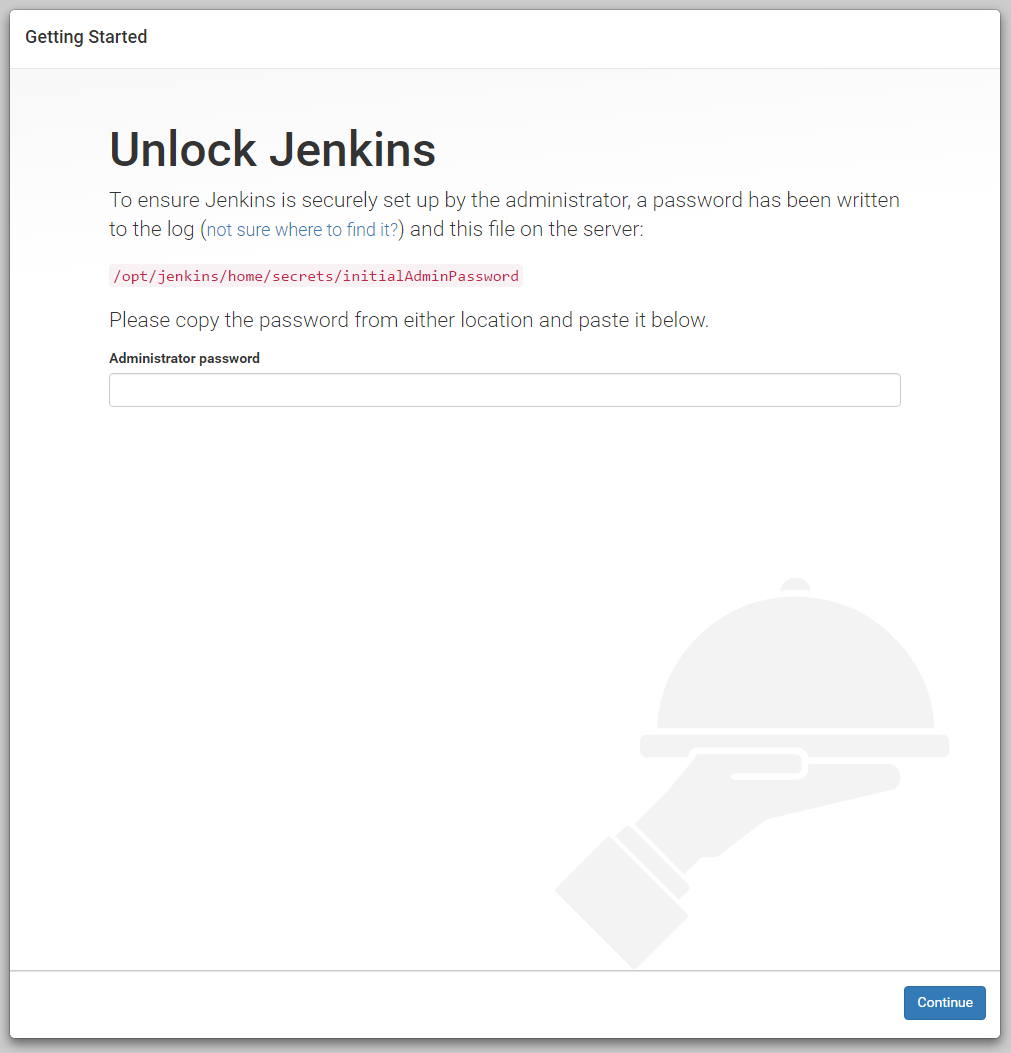
5.2 The first time you navigate Jenkins you will need to log in with the administrator password stored in the file shown, in our example it is in /opt/jenkins/home/secrets/initialAdminPassword
5.2 Continue and in the next step click on Install suggested plugins
If you are an advanced user in Jenkins then click on Select plugins to install in order to install only the useful plugins for your environment.
5.3 Wait the plugins installation is completed
5.4 Create a new administrator user, as it is not recomended to use the super administrator admin
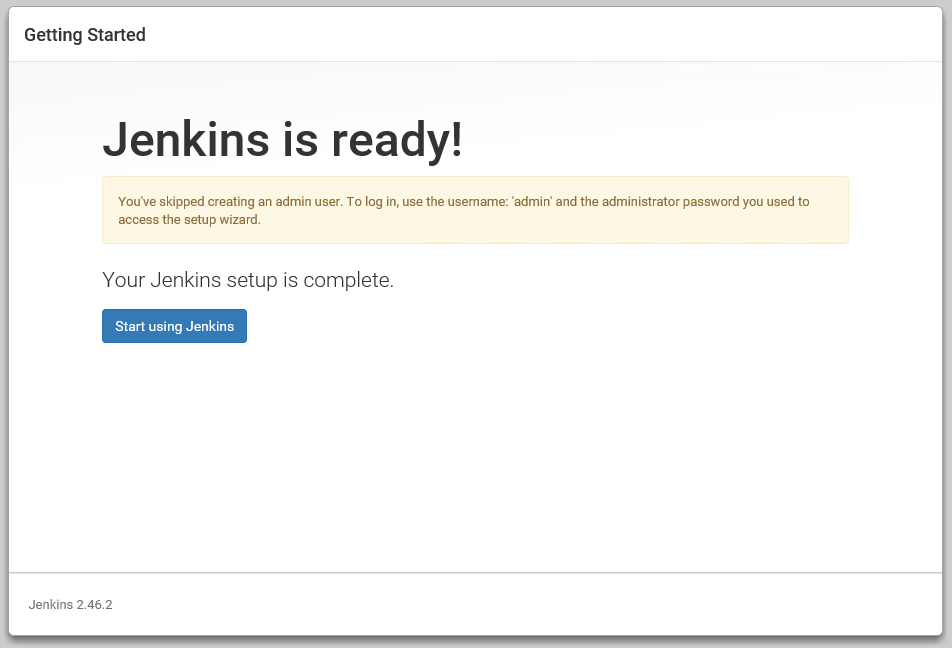
5.5 Jenkins is installed and ready to work
6. Securize the server: close ports
If you have installed Jenkins in the same server in which you will install SonarQube, you only need to close port 8080 on you firewall. We will setup Apache2 as a proxy to Apache Tomcat (will come later, see here)
7. Securize the server: use HTTPS
If you are installing Jenkins in the same server than SonarQube and/or intend to install Apache2 as a proxy (or another proxy), then skip this step.
7.1 Deploy your certificates on /opt/tomcat-certs in PKCS12 format
7.2 Optionally, configure port 80 in /opt/tomcat8/current/conf/server.xml (or /etc/tomcat8/server.xml, accordingly with your installation) replacing
    <Connector port="8080" protocol="HTTP/1.1"
               connectionTimeout="20000"
               URIEncoding="UTF-8"
               redirectPort="8443" />
for
    <Connector port="80" protocol="HTTP/1.1"
               connectionTimeout="20000"
               URIEncoding="UTF-8"
               redirectPort="443" />
7.3 Configure port 443 (or port 8443 if you din't apply previous step) in /opt/tomcat8/current/conf/server.xml (or /etc/tomcat8/server.xml, accordingly with your installation)
    <Connector port="443"
               protocol="org.apache.coyote.http11.Http11NioProtocol"
               maxHttpHeaderSize="16384"
               maxThreads="150"
               SSLEnabled="true"
               scheme="https"
               secure="true"
               keystoreFile="/opt/tomcat-certs/<mycert.p12>"
               keystoreType="PKCS12"
               keystorePass="<p12_certificate_password>"
               ciphers="TLS_ECDHE_RSA_WITH_AES_256_GCM_SHA384,TLS_ECDHE_ECDSA_WITH_AES_256_GCM_SHA384,
TLS_ECDH_RSA_WITH_AES_256_GCM_SHA384,TLS_ECDH_ECDSA_WITH_AES_256_GCM_SHA384,TLS_ECDHE_RSA_WITH_AES_128_GCM_SHA256,
TLS_ECDHE_ECDSA_WITH_AES_128_GCM_SHA256,TLS_ECDH_RSA_WITH_AES_128_GCM_SHA256,TLS_ECDH_ECDSA_WITH_AES_128_GCM_SHA256,
TLS_ECDHE_RSA_WITH_AES_256_CBC_SHA384,TLS_ECDHE_ECDSA_WITH_AES_256_CBC_SHA384,TLS_ECDHE_RSA_WITH_AES_256_CBC_SHA,
TLS_ECDHE_ECDSA_WITH_AES_256_CBC_SHA,TLS_ECDH_RSA_WITH_AES_256_CBC_SHA384,TLS_ECDH_ECDSA_WITH_AES_256_CBC_SHA384,
TLS_ECDH_RSA_WITH_AES_256_CBC_SHA,TLS_ECDH_ECDSA_WITH_AES_256_CBC_SHA,TLS_ECDHE_RSA_WITH_AES_128_CBC_SHA256,
TLS_ECDHE_ECDSA_WITH_AES_128_CBC_SHA256,TLS_ECDHE_RSA_WITH_AES_128_CBC_SHA,TLS_ECDHE_ECDSA_WITH_AES_128_CBC_SHA,
TLS_ECDH_RSA_WITH_AES_128_CBC_SHA256,TLS_ECDH_ECDSA_WITH_AES_128_CBC_SHA256,TLS_ECDH_RSA_WITH_AES_128_CBC_SHA,
TLS_ECDH_ECDSA_WITH_AES_128_CBC_SHA,TLS_ECDHE_RSA_WITH_3DES_EDE_CBC_SHA,TLS_ECDHE_ECDSA_WITH_3DES_EDE_CBC_SHA,
TLS_ECDH_RSA_WITH_3DES_EDE_CBC_SHA,TLS_ECDH_ECDSA_WITH_3DES_EDE_CBC_SHA"
               sslEnabledProtocols="TLSv1.2,TLSv1.1,TLSv1"
               clientAuth="false"
               sslProtocol="TLS" />
Remember to change <mycert.p12> and <p12_certificate_password> for your values.