Update SonarQube
Here we explain how to update your SonarQube™ installation, if you used our documentation for your current installation. Otherwise, following steps can be slightly different. As an example we will show the upgrade procedure to SonarQube 6.7.5. Please, check the official release notes to follow version changes.
1. Stop sonar service
$ service sonar stop
2. Backup database
As we are using PostgreSQL as our preferred database, backup command is:
$ pg_dump -U sonar -h localhost sonar > /home/me/sonar.bak
Password:
If you need to restore your database, follow next commands:

$ sudo -u postgres psql postgres
postgres=# drop database sonar;
postgres=# create database sonar with owner sonar;
postgres=# \q
$ su - postgres
$ psql -U postgres sonar < /home/me/sonar.bak
3. Download the new version
3.1 Visit SonarQube download page
3.2 Download the latest SonarQube version
$ wget -P /tmp https://sonarsource.bintray.com/Distribution/sonarqube/sonarqube-6.7.5.zip
4. Extracts to /opt/sonarqube
4.1 Extracts the downloaded file to /opt/sonarqube
$ unzip /tmp/sonarqube-6.7.5.zip -d /opt/sonarqube

$ ls -la /opt/sonarqube
total 20
drwxr-xr-x  5 sonar sonar 4096 Sep 25 09:31 .
drwxr-xr-x  4 root  root  4096 Sep  7  2017 ..
lrwxrwxrwx  1 sonar sonar   30 Aug  6 09:31 sonar -> /opt/sonarqube/sonarqube-5.6.6
drwxr-xr-x 10 sonar sonar 4096 Jun  2  2015 sonarqube-5.1.1
drwxr-xr-x 10 sonar sonar 4096 Feb 16  2017 sonarqube-5.6.6
drwxr-xr-x 11 root  root  4096 Aug  6 10:29 sonarqube-6.7.5
5. Redefine the symbolic link to SonarQube
5.1 Remove current symbolic link
$ rm /opt/sonarqube/sonar
5.2 Create the new symbolic link
$ sudo ln -s /opt/sonarqube/sonarqube-6.7.5 /opt/sonarqube/sonar
5.3 Set the owner of the new files
$ chown sonar:sonar -R /opt/sonarqube/sonar
6. Setup properties
6.1 Uncomment the following properties, and set the proper password
# User credentials.
sonar.jdbc.username=sonar
sonar.jdbc.password=<mypassword>

#----- PostgreSQL 8.x/9.x
sonar.jdbc.url=jdbc:postgresql://localhost/sonar

. . .
6.2 Add cachéQuality properties to sonar.properties file.
#--------------------------------------------------------------------------------------------------
# CACHEQUALITY
# The following properties MUST be set in order to get the plugin cachéQuality to work.

# Remote license validator
cacheQuality.license.serverUrl=https://www.cachequality.com/api/v1/license

# Local path writable by the Sonar executor to allow manage license info
cacheQuality.license.cache=
6.3 If you want to change the host, port or web context, uncomment and change the proper properties
# Binding IP address
#sonar.web.host=0.0.0.0

# Web context
#sonar.web.context=/sonar

# TCP port for incomming connections
#sonar.web.port=9000

. . .
By default, it will use the server IP (if more than one is available, the sonar.web.host property needs to be set) on port 9000 and root context.
7. Setup wrapper
7.1 Change wrapper.java.command to the absolute java path
wrapper.java.command=/opt/java/default-jdk/bin/java
#wrapper.java.command=java
. . .
8. Get cachéQuality plugin
$ sudo wget --content-disposition https://www.cachequality.com/downloads/cachequality/latest -P /opt/sonarqube/sonar/extensions/plugins
$ sudo chown sonar:sonar /opt/sonarqube/sonar/extensions/plugins/*
9. Start the sonar service
$ service sonar start
10. Update SonarQube
10.1 Open your browser and navigate to https://mydomain/setup
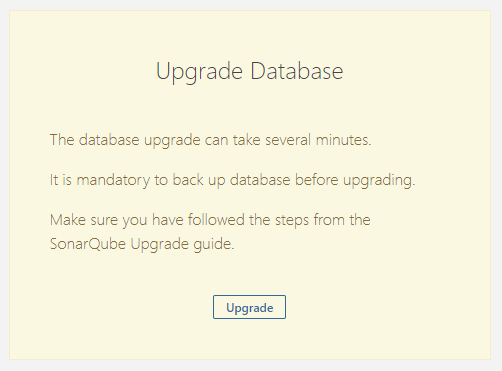
10.2 SonarQube will show a message to upgrade your database, so you must click on Upgrade button

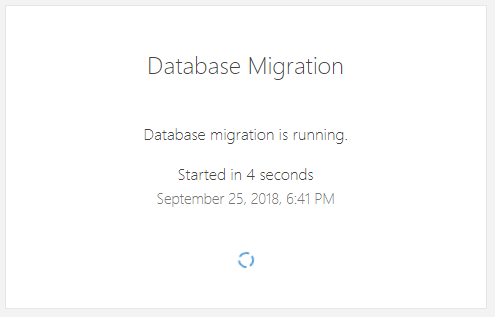
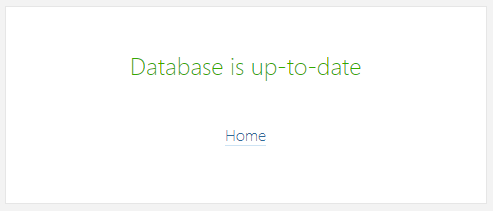
10.3 The databse will be updated and at the end just click on Home link to go back to SonarQube.


